Cut designs that are larger than your mat (Cricut)
How to cut Porch Sign Designs in Cricut Design Space
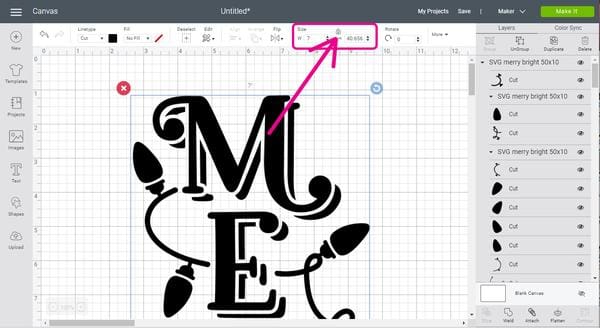
1. Upload your design to Design Space and resize it using the size option in the top panel. Keep that little lock closed so the dimensions stay the same.

2. Select the design and Weld it. This is very important, do not skip this step.

3. Create a square shape.

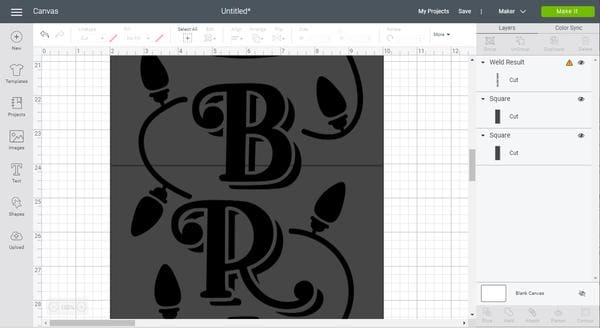
4. Resize the shape to 11"x23" because that's the largest size you can cut with your 12"x24" mat. You will need to unlock the little lock first.
I set the width smaller than 11" because in this case the design is only 7" wide and I like to save vinyl. ;-)

5. Move the shape to the back so you can see the design. Right-click on the shape and select "Send to Back".

6. Select the shape, right-click on it and select "Duplicate". That will copy the shape.

7. Align the second shape right underneath the first shape. If two shapes won't cover your design you will have to create a third shape.

8. Select the first shape and the design.

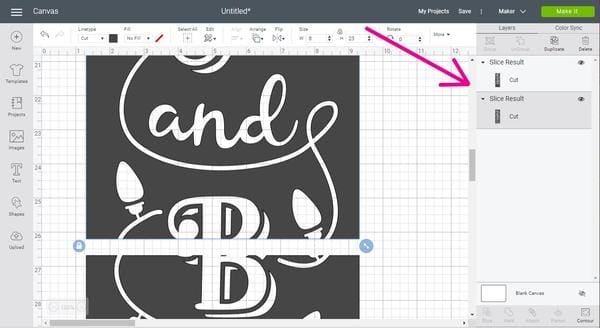
9. Click on the "Slice" button.

10. Select the second shape and the design and click on "Slice" again. When you are done you can move all the separate parts.

11. Delete the parts that you don't need. I'm cutting a stencil so I will keep the two solid shapes.

12. Hit "Make" and you are all done!

I know there are quite a few steps to get to the final result but it's so worth it! Porch signs are a lot of fun to make. I hope you will enjoy creating yours!


Add a comment