
How to trace white objects in Silhouette Studio
If you've tried to trace a white object (like a sticker with offset) in Silhouette Studio, you probably noticed that it doesn't work. Well, at least it doesn't if you don't use a little trick. You need to make the white object more visible for Silhouette Studio to recognize it. Here is what you need to do ...
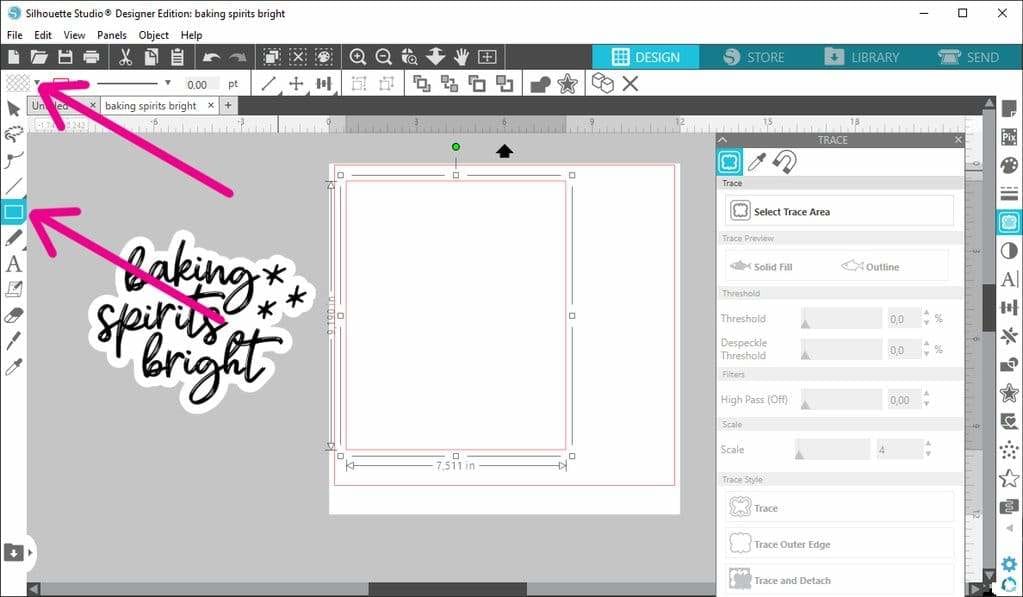
1. Create a rectangle and fill it with the color black.
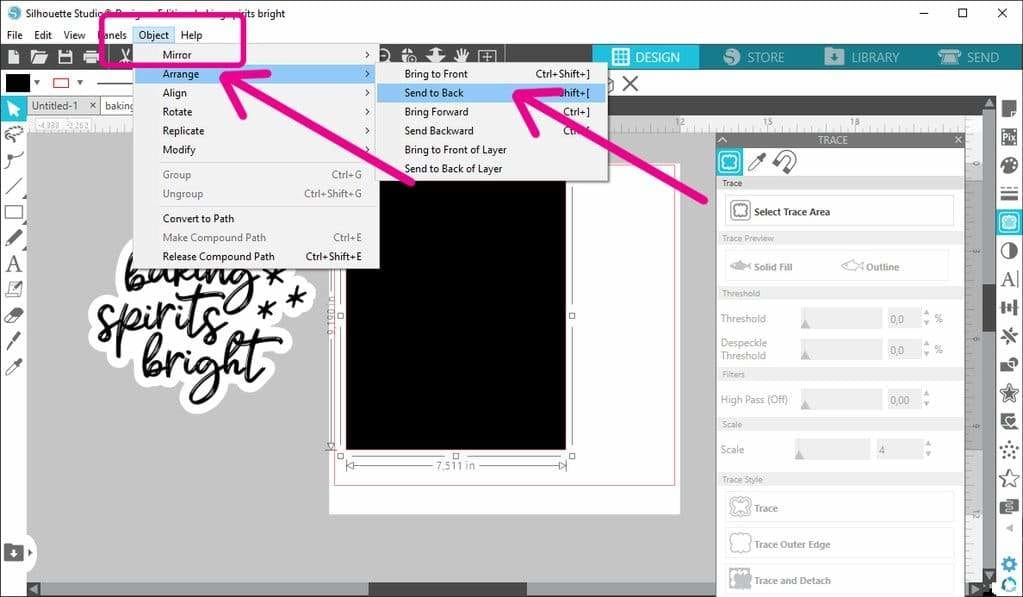
2. Send the rectangle to the back so the design will be on top. Go to "Object" - "Arrange" - "Send to Back"
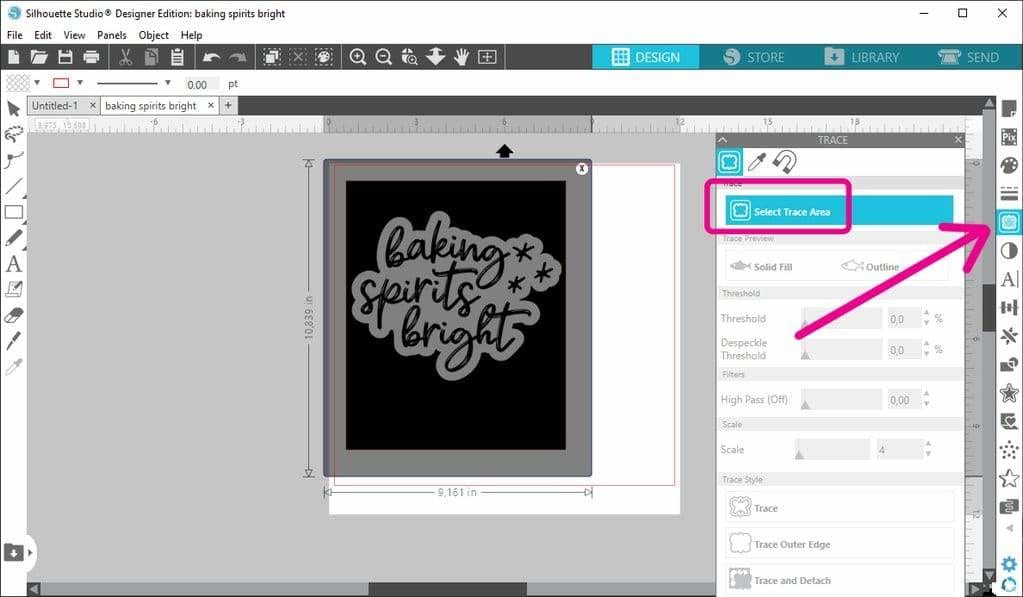
3. Open the "Trace" panel, click on "Select Trace Area" and draw a box with your curser that covers the black rectangle and the design.
4. Select "Solid Fill", increase the "Threshold" to 100% and make sure the "High Pass" is off. Press "Trace".

5. Delete the black rectangle and move the design to the side so you can see the trace lines that you've created. Select the trace lines and go to "Object" - "Release Compound Path".

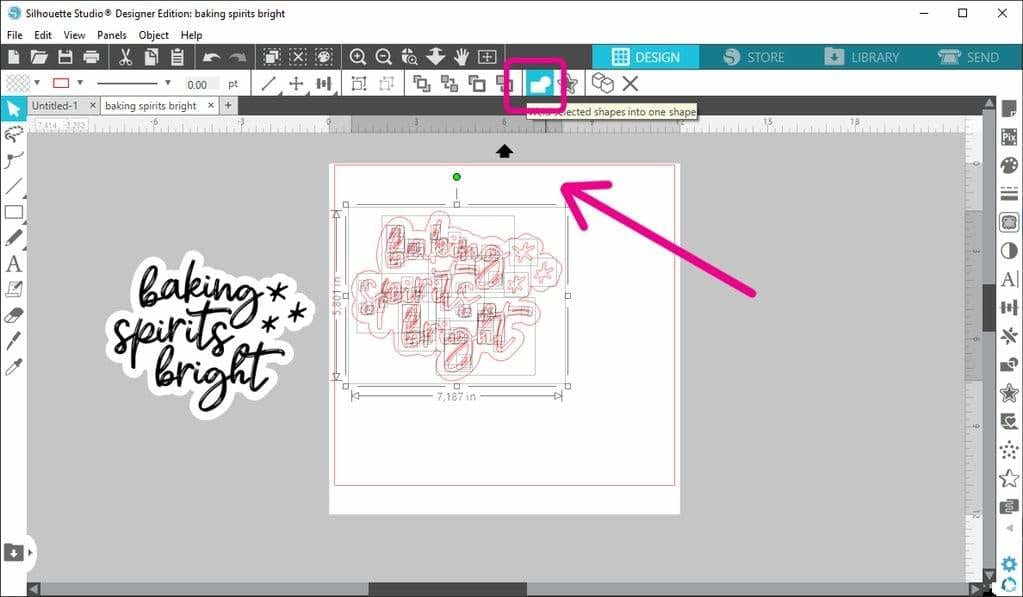
6. Delete the rectangle and select the remaining elements. Press the "Weld" icon.
7. Select the design and the trace outline. Click on the "Align" icon and select "Align Center".

8. With both objects still selected go to "Align" and this time click on "Align Middle". You can find the icon right underneath the "Align Center" icon.
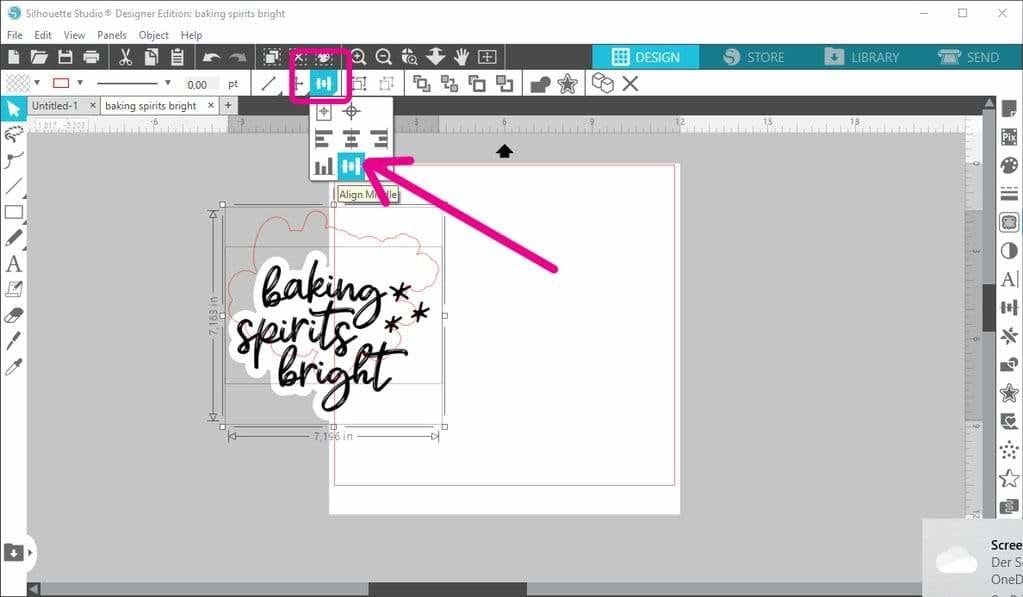
That's it! You have traced a white object and aligned the trace line with the design which is necessary for print and cut.


Add a comment